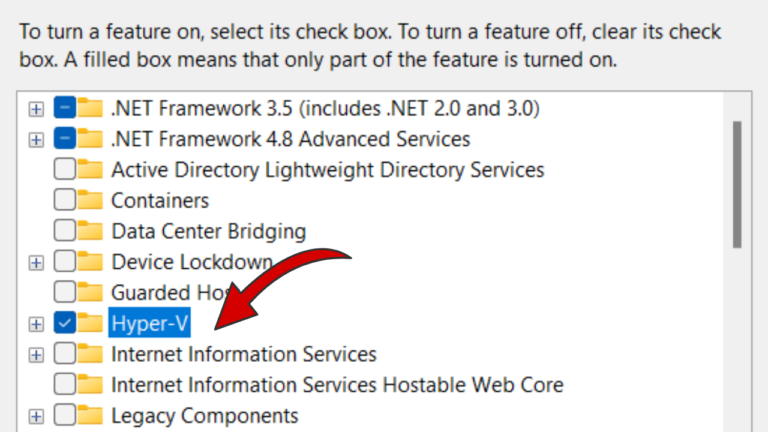
For step-by-step instructions, check out the YouTube video at the bottom of the post! It will guide you through the process of enabling and installing Hyper-V on Windows 11 Home in detail.
Hyper-V is a virtualization feature built into Windows, allowing you to create and run virtual machines (VMs) on your PC. However, if you’re using Windows 11 Home Edition, then Hyper-V is missing. It’s because Hyper-V isn’t enabled by default on Windows 11 Home Edition, and you won’t find it in the Windows features list.
Fortunately, there’s a workaround to install and enable Hyper-V on Windows 11 Home. Follow these steps:
Step 1: Check System Requirements
Before proceeding, ensure that your system meets the following requirements:
- Windows 11 Home
- At least 4 GB of RAM (8 GB recommended)
- Virtualization enabled in BIOS/UEFI (usually labeled as Intel VT-x or AMD-V)
To check if virtualization is enabled, open Task Manager (Ctrl + Shift + Esc), go to the Performance tab and look for the Virtualization section at the bottom right. If it says, enabled, then head over to the next step. Otherwise, enable Hyper V from your BIOS first.
Step 2: Create a Script to Enable Hyper-V
Hyper-V isn’t officially available on Windows 11 Home, but you can enable it via a batch script:
Open Notepad and paste the following code:
   pushd "%~dp0"

dir /b %SystemRoot%\servicing\Packages\*Hyper-V*.mum >hyper-v.txt

for /f %%i in ('findstr /i . hyper-v.txt 2^>nul') do dism /online /norestart /add-package:"%SystemRoot%\servicing\Packages\%%i"

del hyper-v.txt

Dism /online /enable-feature /featurename:Microsoft-Hyper-V -All /LimitAccess /ALL

pause
Save this file with a .bat extension (e.g., Enable_HyperV.bat).
Right-click the file and select Run as Administrator.
This script will install and enable Hyper-V on your Windows 11 Home system.
Step 3: Restart Your PC
After the script runs successfully, restart your computer to apply the changes.
Step 4: Verify Installation
Once your PC restarts, you can verify if Hyper-V is installed:
Press Windows + R, type optionalfeatures.exe, and press Enter.
Scroll through the list and ensure that Hyper-V is enabled.
You can now use the Hyper-V Manager to create and manage virtual machines.
That’s it! You’ve successfully installed and enabled Hyper-V on Windows 11 Home. If you have any questions or run into issues, feel free to drop a comment below.
