Sometimes you experience high CPU usage due to Ntoskrnl.exe on a Windows 11 PC. The worst thing about this issue is that it makes the computer slow down and impacts the overall performance of the CPU.
Due to the slow and poor PC performance because of Ntoskrnl.exe high CPU if you’re annoyed, then you need not worry about it. Here we will be discussing what Ntoskrnl.exe is, the Causes of Ntoskrnl.exe’s High CPU Usage, and how you can fix it.
What Is Ntoskrnl.exe?
Ntoskrnl.exe or Windows NT Operating System Kernel is a memory handler process. This provides the kernel as well as the executive layers of the Windows NT kernel space. This process is responsible for various system services including memory management, process management, and hardware virtualization. It is a fundamental and integral part of a Windows operating system and therefore it is a protected system file that cannot be deleted or corrupted easily.
Windows 11 Ntoskrnl.exe High CPU Usage Causes
There can be various reasons as to why you may face high CPU or disk usage by Ntoskrnl.exe on Windows. Below are some reasons for this issue to occur:
- Compressed Memory Usage: Opening multiple applications can lead to increased RAM usage, subsequently impacting CPU performance.
- Malware or Virus Infection: Security threats, such as viruses or malware, can cause CPU lag and compromise overall system performance.
- Outdated or Corrupted Drivers: Drivers, essential for smooth system operation, may cause issues if outdated or corrupted.
- Corrupted Ntoskrnl.exe File: Although rare, corruption of the Ntoskrnl.exe system file can result in performance problems.
Fix: Ntoskrnl.exe High CPU Usage Windows 11
Given below are a few troubleshooting steps to help you fix the high CPU or disk usage by Ntoskrnl.exe on Windows.
Windows Update:
Make sure your Windows 11 operating system is fully updated. Microsoft regularly releases updates to fix bugs and improve system performance.
Check for Disk Errors:
Run the Check Disk utility to scan and fix disk errors. Open Command Prompt as Administrator and run the following command: chkdsk /f
Power Plan Settings:
Adjust your power plan settings to Balanced or High Performance. Sometimes, power-saving settings can cause issues with CPU usage.
Update BIOS/UEFI:
Check if there are updates available for your computer’s BIOS/UEFI firmware. Be cautious while updating the BIOS and follow the manufacturer’s instructions carefully.
Check for Memory Issues:
Use the Windows Memory Diagnostic tool to check for memory-related problems. Open the Start menu, type “Windows Memory Diagnostic,” and follow the on-screen instructions.
Update Your Drivers
The very first thing that you can try doing is updating your drivers. You can update drivers using Windows Update.
Press the Windows + I key combo to open the Settings on your PC.
In the Settings, search for Windows update and open it.
Here, click on Check For Updates. Settings will begin checking for the latest updates.

When the settings app is done finding the updates, you will see an Optional updates section. Click on it, and you will find the driver update here.
Download and install the update. After installing the updates, restart your PC, and you will no longer face the issue.
You can either use third-party apps like Driver Booster or the DriverPack Solution to update the drivers on your PC. These apps scan your PC for all the driver updates and also install them with ease.
If you are using a laptop then you can simply head to the website of your laptop manufacturer. There, search for your laptop model, open it, and you will get the driver updates for your laptop here. You can now download and install them.
Check this video for all the ways to update drivers
Scan Your PC With The Antivirus Program
Another thing that you can try doing is scanning your PC with the Antivirus program. You can use Windows Defender to scan your PC for virus infection. Windows Defender is a built-in antivirus tool on your PC using which you can scan your PC for the virus.
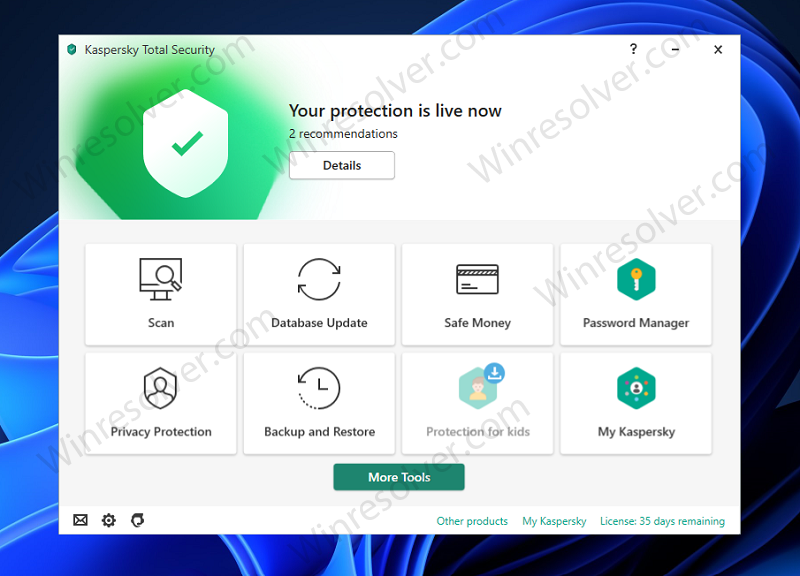
If you are using any third-party song on your PC, then you can prefer using that to scan your PC for the virus. Scan your PC for viruses or malware and check if you still face the issue or not.
Check For Incompatible Programs
If you started facing this issue after installing any program, then it may be because the program is corrupted. If the installation was incomplete, if the file was damaged, or if you are trying to run incompatible software on your PC, then you may face this issue.
Try uninstalling the program after which you faced the issue, and check if you still face the issue or not. If you still face the issue, then the program was not the reason behind it. However, if you no longer face the issue, then the program was causing it.
Change The Registry Settings
You can try changing certain registry settings. This will help you optimize the performance of your PC, and also fix this issue. To change the Registry settings, follow the steps given below-
Press the Windows + R key combo on your keyboard to open the Run dialog box on your PC.
In the run dialog box, type Regedit and then press Enter or click on OK to open the Registry Editor. Head to the following path in the Registry Editor-
Computer\HKEY_LOCAL_MACHINE\SYSTEM\CurrentControlSet\Control\Session Manager\Memory Management
Now on the right side, double-click on the ClearPageFileAtShutdown registry.
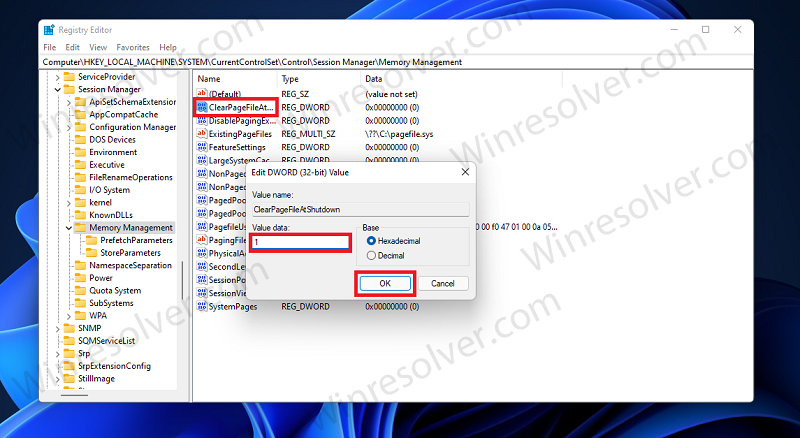
Now set the Value data to 1, and then click on OK.
After doing so, restart your PC and you should no longer face the issue.
Disable Windows Search Service
The next thing that you can do is disable the Windows search service. Here’s how you can do that:
Press the Windows + R key combo to open the Run dialog box.
In the run dialog box, type services.msc and click OK or press Enter to open the Services app.
In the Services app, search for Windows search and double-click on it. This will open the Windows Search Properties window.

Head to the General tab in the properties, and click on stop to stop the service.
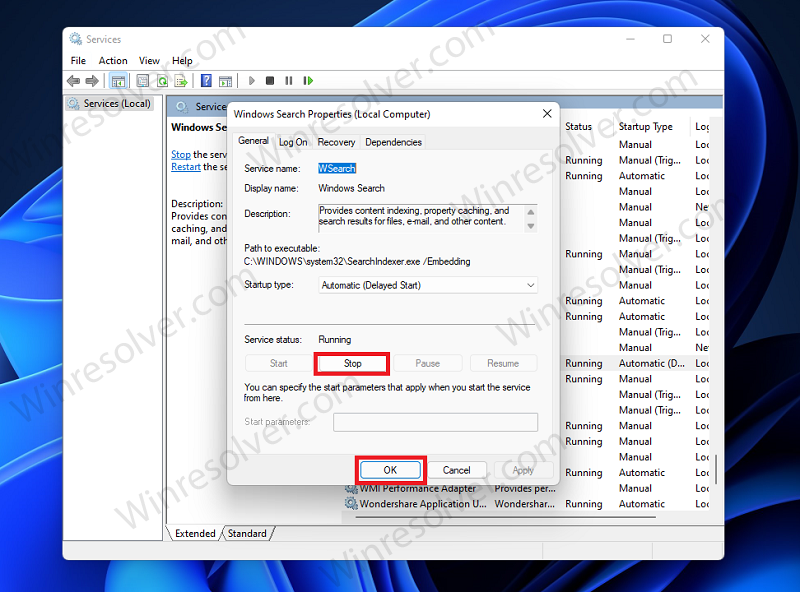
Now click on OK to save the changes, and close the services app.
SFC Scan
SFC Scan or the System File Checker scans your PC for corrupted or damaged files and fixes them. To run the SFC scan, follow the steps given below:
Click on the Search icon and type, CMD. When Command Prompt appears in search results, click on Run as administrator to give administrator privileges to the Command Prompt.
In the command prompt, type the command sfc /scannow and hit Enter to execute the command.
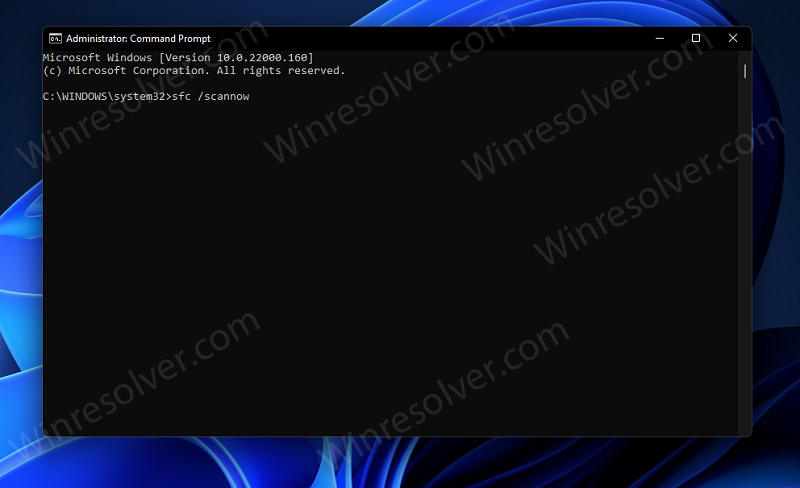
Wait for the process to complete, and once the process is complete, you should no longer face this issue.
Run DISM Scan
You can run the DISM scan to fix any issue with your PC. To run the DISM scan, follow the steps given below-
In the Start menu, search for CMD. Right-click on the Command prompt, and then click on Run as administrator.
In the command prompt, type Dism /Online /Cleanup-Image /RestoreHealth and hit Enter to execute the command.
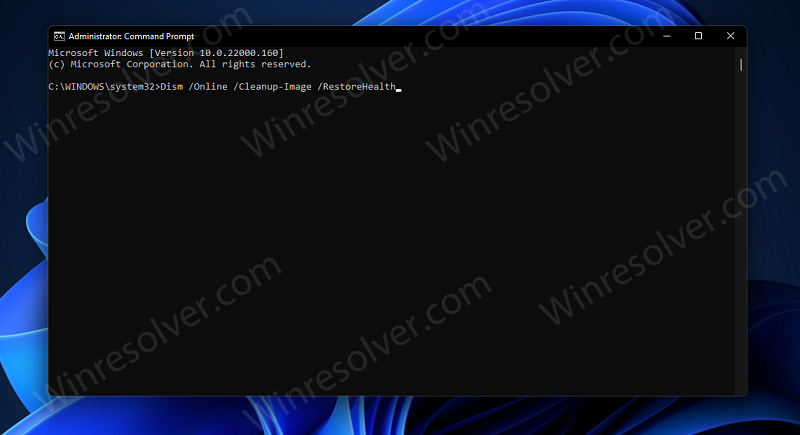
Wait for the process to complete, and then restart your PC. You should no longer face the issue.
That’s how you can fix high CPU or Disk usage by Ntoskrnl.exe on Windows. Following the above steps, you will be able to solve the issue you are facing.
