Audio services on a PC are responsible for playing audio through the device. However, when the sound device is unresponsive or is causing some problem, one may encounter ‘Audio services are not responding’ in Windows 10.
Fix – Audio Services Are Not Responding In Windows 10
This is a common error that users can encounter in Windows 10. If you are facing this issue, then there is nothing to worry about it, as in this guide we will be discussing some troubleshooting steps to help fix audio services that are not responding in Windows 10.
Restart The Audio Service
The very first thing that you should do is restarting the audio service. Due to some random bugs or temporary conflicts with the audio service, you may face this issue. This may be solved by restarting the audio services. To restart the audio service, follow the steps given below-
Click on the Start icon to open the Start menu. In the Start menu, search for Services and open it.
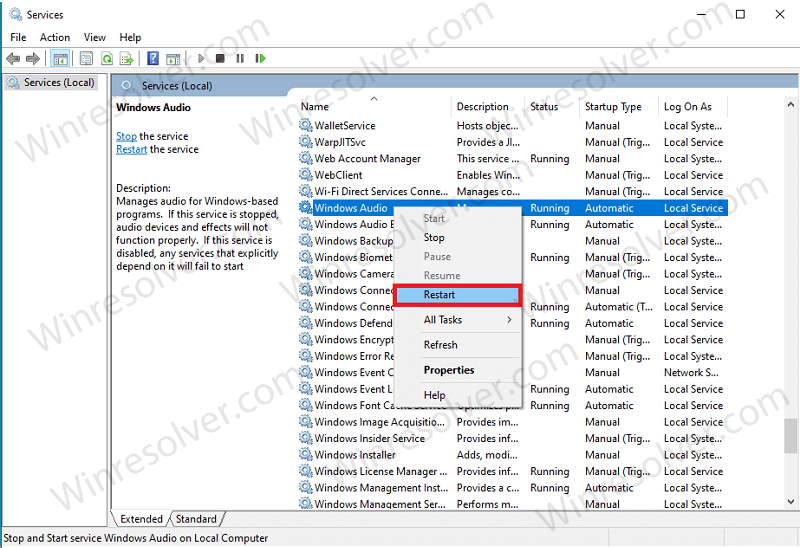
In the Services, search for Windows Audio service, and select it.

Right-click on the Windows Audio and then click on Restart. Right-click on this service again, and then click on Properties.
In the General tab, search for the Startup type. Click on the drop-down menu next to the Startup type and then set it as Automatic.
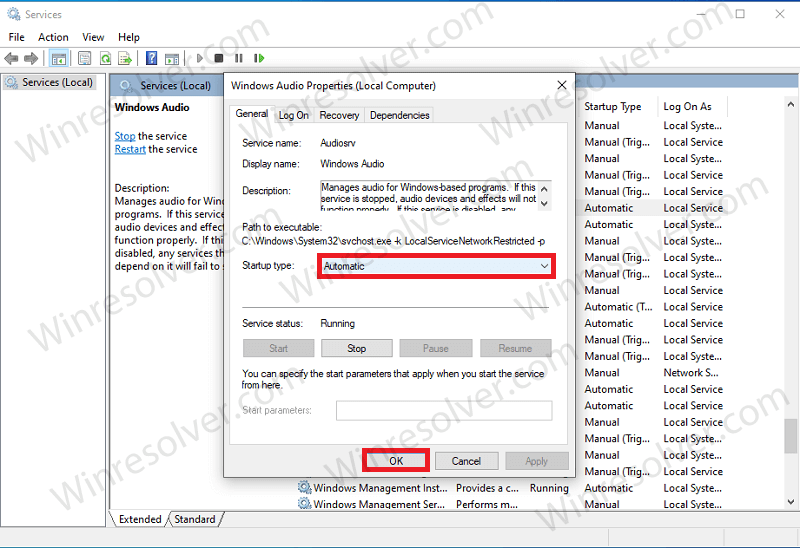
Next click on Apply to apply the changes.
Now do the same for the Windows Audio Endpoint Builder service.
Run The Audio Troubleshooter
You should try running the audio troubleshooter. Audio troubleshooter helps identify the issue you are facing, and will also help solve it. To run the audio troubleshooter, follow the steps given below-
In the Start menu, search for Troubleshoot settings and open it.
Click on the Additional troubleshooters in the Settings window that opens up.
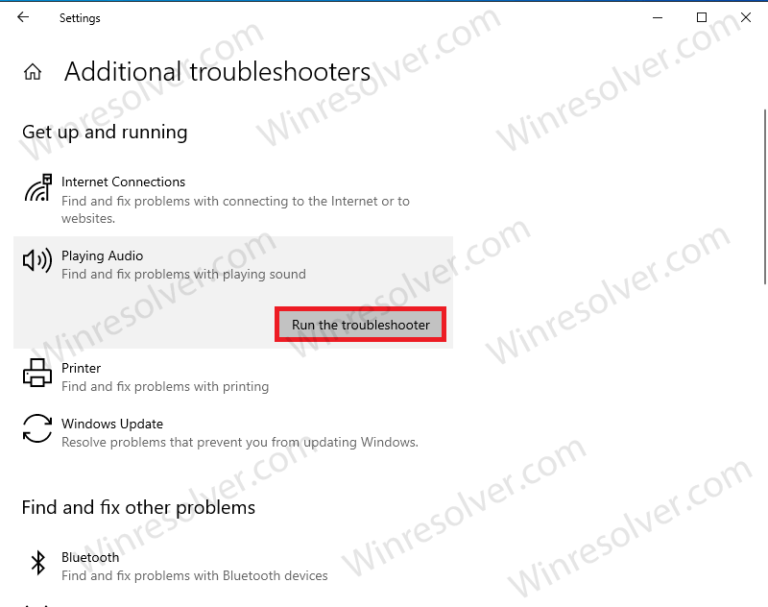
Here click on Playing audio and then click on Run the troubleshooter.
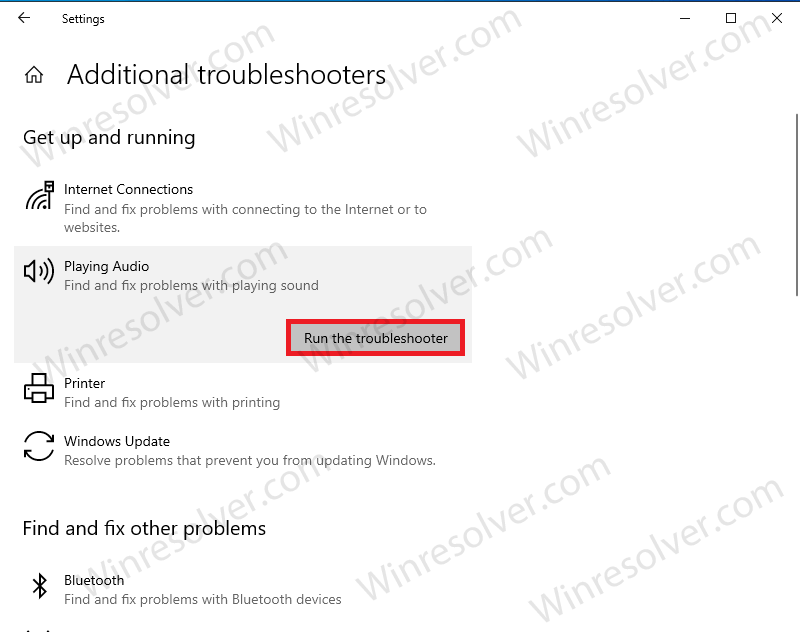
Now follow the on-screen instructions to run the troubleshooters and also solve the issue you are facing.
Using Command Prompt To Fix The Issue
You can also use the command prompt to Audio services that are not responding in Windows 10. To do so, follow the steps given below-
In the Start Menu, search for CMD. Right-click on the Command Prompt, and then click on Run as administrator.
In the Command Prompt, type the command: net localgroup Administrators /add networkservice and hit Enter.
After doing so, execute the following command: net localgroup Administrators /add localservice
Wait for the process to complete, and then close the Command Prompt and restart your PC.
After doing so, you should now no longer face the issue that you were facing with the audio service.
Modifying Registry Settings
You can modify the registry settings to fix the issue with the audio service that you were facing. Follow the steps given below to modify the registry settings-
Press the Windows + R key combo to open the Run dialog box on your PC.
In the Run dialog box, type Regedit and then click on OK or hit Enter to open the Registry Editor on your PC.
In the Registry Editor, navigate to the following path-
Computer\HKEY_LOCAL_MACHINE\SYSTEM\CurrentControlSet\Services\AudioEndpointBuilder\Parameters
On the right side, select ServiceDll and double-click on it to edit it.
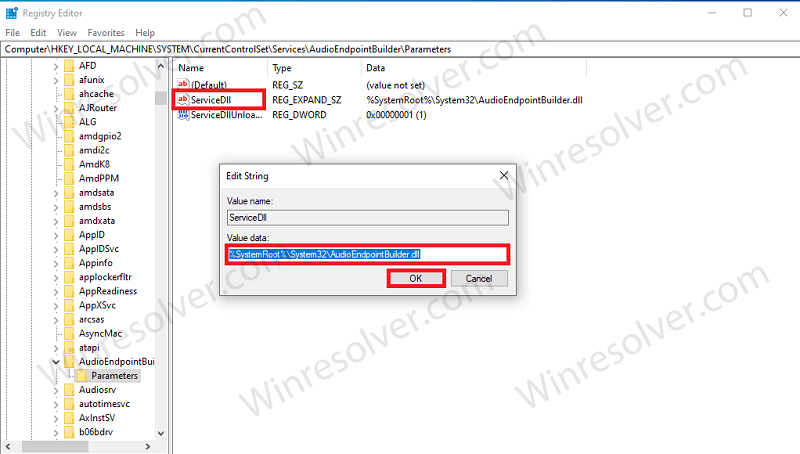
- Set the value data to
%SystemRoot%\System32\AudioEndPointBuilder.dlland then click on OK. - Now close the Registry Editor and restart your PC to save the changes.
Ensure Audio Components Are Running
If the issue is still not fixed, then you should ensure that the audio components are running on your PC. To do so, follow the steps given below-
Press the Windows + R key combo to open the Run dialog box.
In the Run dialog box, type services.msc and hit Enter.
In the Services app, search for the following services:
- RPC Endpoint Mapper
- Remote Procedure Call (RPC)
- DCOM Server Process Launcher
Check whether their state is running or not. If they are not running, then right-click on them, and then click on Start.
Right-click on them again individually, click on Properties and set the Startup type to Automatic.
Click on Apply, close the Services app and then restart your PC, to save the changes.
Update The Audio Drivers
If you still face this issue, then you should try updating the audio drivers. You can update the audio drivers using the device manager. To update the audio drivers using device manager, follow the steps given below-
In the Start menu, search for Device Manager, and open it.
Now double-click on the Audio inputs and outputs option in the Device Manager to expand it.
Here select the audio device, right-click on it, and then click on Update Driver to update the driver.
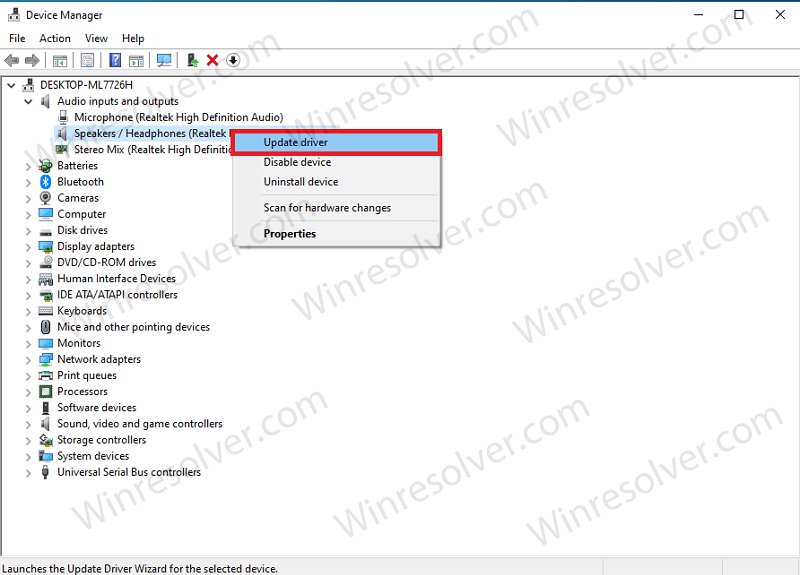
After updating the driver, restart your PC, and you should no longer face the issue.
Reinstall Audio Drivers
The next thing that you can try doing is reinstalling the audio drivers. You can face this issue due to conflicting audio drivers, which can easily be fixed by reinstalling the audio drivers on your PC. To do so, follow the steps given below-
Press the Windows + X key combo and then from the menu, click on Device Manager to open it.
In the Device Manager, expand the Audio inputs and outputs option by double-clicking on it.
Now, select the audio device causing the problem. Right-click on it, and then click on Uninstall device. This will uninstall the audio driver from your PC.
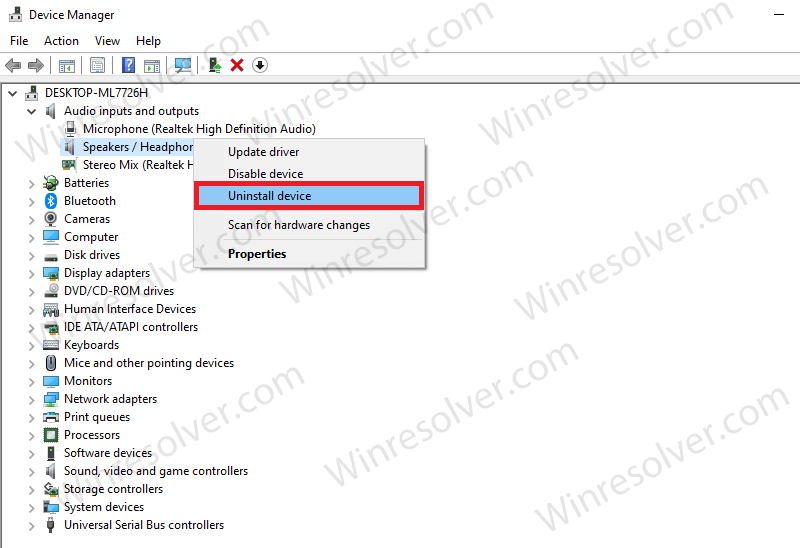
To reinstall it on your PC, you will have to restart your computer. Close the Device Manager, and restart your PC.
This should most probably solve the issue of ‘Audio services are not responding’ in Windows 10
These were some troubleshooting methods to fix audio services not responding in Windows 10. Following the above steps, you will be able to solve the issue.
